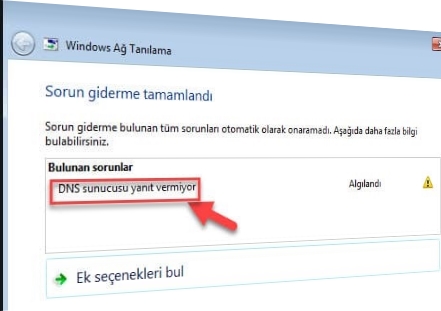
How to Solve DNS Server Not Responding Error?

Last updated: October 6, 2020
DNS server not respondingis a warning that may appear while visiting websites on the Internet. Firstly DNS server not responding you need to know the source of the problem.
What is the DNS server not responding?
When connecting a device to the internet, internet connection may not be established due to various reasons. The DNS error can occur even if your computer is configured properly. With this issue, Windows 7, Windows 8, Windows 10 It can be encountered in all operating systems. DNS Failure situations result in your device being unable to access the internet. The most common error message is “DNS server not responding “Warning.
Solution for DNS Server not responding error
Firstly DNS server not responding you need to know the source of the problem.
- 1 – Connect to the Internet with a phone, tablet or any other device you have and try to access the site you are having problems with. If you can access the site you are having trouble with on a different device, the problem is most likely with your computer.
- 2 – If you cannot access the site that gives the error from the alternative device, the problem may be with your modem. To test this, try connecting to the problem site with mobile data. If you cannot connect to the site using mobile data, the problem is most likely caused by the website.
- 3 – Another simple thing you can do to identify the source of the problem is to change the browser. With a different browser DNS server not responding If you are not getting the error, the problem is most likely with the browser you are using.
- 4 – Unplug your modem’s power adapter and wait for 30 seconds to 1 minute. Then plug the adapter back in and wait for the internet to come back. If you have an extra signal booster If you are using it, you can also try to connect via ethernet. If you are getting the same error with an Ethernet connection, the problem may be in your DNS settings.
If the DNS server not responding problem persists even after performing the simple steps above, clearing the DNS cache will solve your problem.
Clearing Window DNS cache for;
- 1# To the search menu “cmd” in summer.
- 2# Run the Command Prompt application as an administrator.
- 3#: ipconfig /flushdns Enter the command and press Enter.
- 4# ipconfig /renew Enter the command and press Enter.
- 5# ipconfig /registerdns Enter the command and press Enter.
- 6# Restart your computer.
Flushing the MAC DNS cache for;
- 1# Command + Space Open Spotlight by pressing.
- 2# Search for Terminal and open the Terminal app.
- 3# sudo killall -HUP mDNSResponder Paste the command into Terminal and press Enter (Return).
- 4# Restart the system.
In addition to this process, you can also change your DNS address manually.
Windows DNS change for;
- 1# Open the Control Panel from the Start menu.
- 2# Open the “Network and Internet” menu.
- 3# Open the “Network and Sharing Center” menu.
- 4# Click on the “Change adapter settings” button.
- 5# Right click on the network you are using and click “Properties”.
- 6# Select “Internet Protocol Version 4 (TCP / IPv4)” and click the “Properties” button.
- 7# Manually change the DNS server address.
Change MAC DNS for;
- 1# Open the System Preferences menu from the Apple logo and click on the Network logo.
- 2# Select the network you are connected to and click the “Advanced” button.
- 3# Press the DNS option and the + button at the bottom left.
- 4# Enter either OpenDNS or Google DNS address.
- 5# Click on the Hardware tab.
- 6# Select the “Manual” option from the Set up section.
- 7# Select the “Custom” option from the MTU section.
- 8# Enter the value 1453 in the blank box.
- 9# Press the OK button, then the Apply button.
- 10#Restart the system.
No problem DNS addresses:
- Google: 8.8.8.8 – 8.8.4.4
- OpenDNS: 208.67.222.222 – 208.67.220.220


